Shopware
Integration manual
IDEAL
1. Introduction to iDEAL
The payment method iDEAL is of particular interest to merchants who want to sell their product in the Netherlands. Here, the payment is carried out based on the online banking of the customers in the Netherlands.
Your Dutch customers (end customers) do not have to register for iDEAL: They can make a fast and easy payment using their online banking details. Thanks to real time acknowledgement of the transfer order, you as a merchant can immediately ship the goods or provide services.
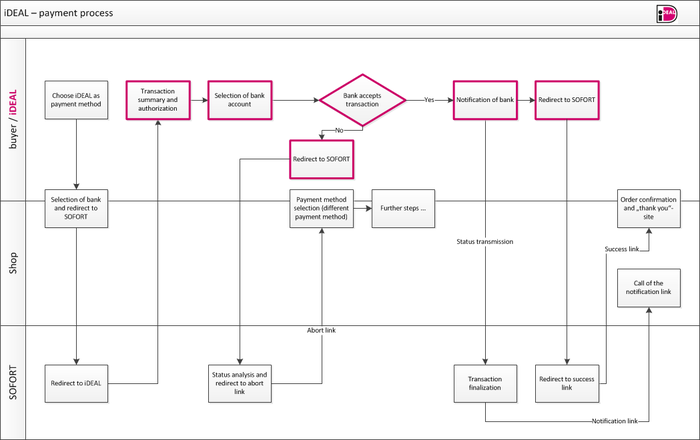
From your customer's perspective, an iDEAL transaction consists of the following steps:
- As soon as payment is requested by iDEAL, the customer selects the Dutch bank of his/her current account and is redirected via a SOFORT page to the iDEAL payment form.
- Below the overview of the transfer data (recipient, reason, amount), your customer is requested to authorise the payment.
- The next step is the selection of the account to be used for the payment.
- After a successfully completed transaction, your customer is redirected back to your shop.
IMPORTANT!
- You need a Deutsche Handelsbank account in order to use iDEAL.
- The application must be integrated in the system of the provider in such manner that the URL and the SSL certificate of SOFORT can be recognised and verified for the customer of the provider.
- The standard coding used for all parameters is UTF-8! Please bear this in mind especially for hash computation.
- The account data (account number, IBAN) are transferred as masked entries for the redirection via the success link and the HTTP notification. Sole exception: HTTPS protocol with POST method
2. Integration steps
The following steps are required to integrate iDEAL in Shopware iDEAL :
- Register as a merchant on our website https://www.sofort.com/register
- Create a new SOFORT project and configure it
- Install the SOFORT module in the shop
- Set up the SOFORT module in the administration backend of your shop
3. iDEAL project setup
3.1. Registration at ''Direct Bank Transfer''
In order to be able to offer ''Direct Bank Transfer'' in your shop, a customer account with ''Direct Bank Transfer'' is required.
If you do not have such an account you may register at https://www.sofort.com/register.
After your registration, you have to be logged on in the merchant area and have to create a project for your system / online shop. If you do not use ''Direct Bank Transfer'', you have to activate the desired product. Go to "My account > Product activation" in the left navigation bar.
3.2. Create a new SOFORT project
To set up a project, log in to the SOFORT merchant menu and click "New project" in the left column. Select "Create iDEAL Project" under SOFORT Classic Project.
IMPORTANT: Please choose iDEAL as the desired project.
You will be asked at this point whether you already have aDeutsche Handelsbank account. To apply for a Deutsche Handelsbank account, fill the account request and click "Save". The account request will be sent to you by email. Print out the request and send it back to Deutsche Handelsbank by PostIdent including all required documents.
NOTE!
- Before the project can be used, it must be reviewed and activated by SOFORT.
- You need a Deutsche Handelsbank account to create an iDEAL project. You can apply for an account during project setup. Please contact Deutsche Handelsbank by email at support@handelsbank.com for any questions.
Complete your project data now. The most important settings are:
General settings
- Project name: Enter the name of your shop here.
- Shop system: Select your shop system.
- Test mode: By activating this option, you can test iDEAL. More information can be found in the "Testing" chapter. In activated test mode, you can generate test transactions which will not become effective and which therefore will not cause any cost. Real transactions cannot be carried out in test mode.
Address
- Enter the data for form of address, first and last name, name additive, street, street additive, post code, city, and country to be displayed to the customer on the iDEAL payment wizard.
- Industry: Select your industry.
- Website: Enter the URL of your online shop.
Interface
- Success link: Enter the URL (starting with "http://" or "https://") of your shop system to which your customers are to be redirected after successful completion of the iDEAL payment. If you use a standard shop module, you can find the necessary information at the top in the help text (blue "i") under "Shop System" or on the configuration pages of your shop module. Please enter the following for your shop system:
-USER_VARIABLE_3-
- Abort link: Enter the URL (starting with "http://" or "https://") of your shop system to which your customers are to be redirected after an unsuccessful or faulty iDEAL payment process. If you use a standard shop module, you can find the necessary information at the top in the help text (blue "i") under "Shop System" or on the configuration pages of your shop module. Please enter the following for your shop system:
-USER_VARIABLE_4-
- Timeout in seconds: Enter the time in seconds which may elapse when calling the iDEAL payment wizard before your customer will be redirected by SOFORT to the abort link.
Notifications
- Activate email notification: Mark this checkbox if you want to be notified by email of an iDEAL payment.
- Email address: Enter the email address to be used for notifications.
- Language: Determine the language in which the confirmation email is to be written.
- Activate HTTP(S) notification: Activate this checkbox if you want to be notified of an iDEAL payment by calling a HTTP(S) page (or a PHP script).
- HTTP(S) URL: Enter the URL (starting with "http://" or "https://") of your shop system to be called in case of a notification of an iDEAL payment. Please enter the following for your shop system:
-USER_VARIABLE_5-
After you have saved the settings, please select the tab "Extended settings". Go to "Passwords and hash algorithm" to create a Project password and a Notification password and to determine the Hash algorithm " SHA1 " for the input check.
If you desire, you can set a master password under "Extended settings > Master Password" to protect your project settings. Only those who know the master password can change the settings in the project. This is useful when a colleague for example is only allowed to verify the payments.
4. Interface installation
If you do not use the preinstalled module, carry out the following steps. Otherwise, you may skip the upload and continue installing the SOFORT module.
NOTE:
- It is recommended to make a backup copy of your shop and database before you make any changes in your shop system.
- Please ensure to deinstall any previous version of the module
4.1. Interface download
In order to use Shopware in your shop system, you first have to download the SOFORT module for Shopware : https://www.sofort.com/integrationCenter-eng-DE/.
Note: When using Shopware 4.3.4 or higher the manual installation described in this section is not recommended. Please install the plugin directly from the Shopware Community Store in the Plugin Manager.
4.2. SOFORT module upload in Shopware (only Shopware versions < 4.3.4)
To integrate the interface for SOFORT products, proceed as follows:
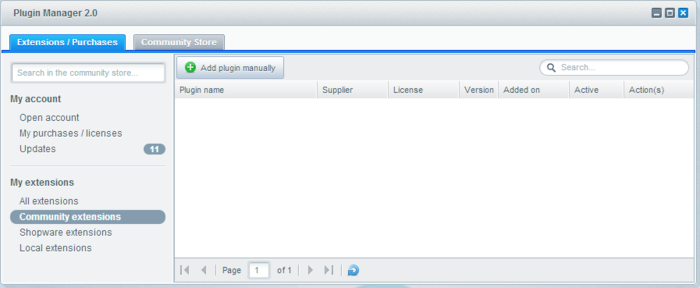
1. Open the admin interface of your Shopware shop, go to the menu item "Configuration > Plugin Manager" and click the button "Add plugin manually"
2. Insert the previously loaded ZIP file in the field "Upload plugin".
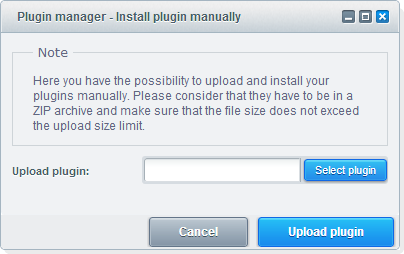
3. Finally click the button "Upload plugin".
4.3. Payment method installation
The next step after uploading the SOFORT module is the installation.
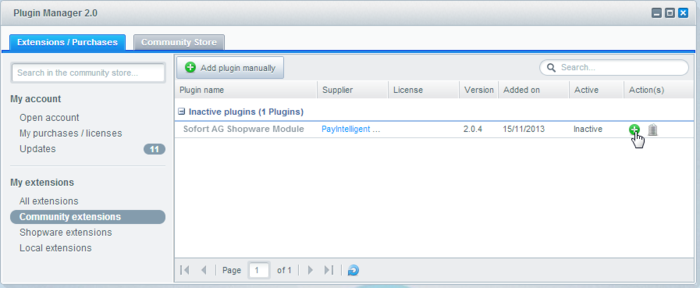
1. Locate the payment module of the SOFORT named "SOFORT Gateway" in the list. Click the green plus sign to the right of the module (if a blue, round arrow is displayed to the right of the plus sign, click it before the installation to update the module).
5. Module configuration
After successfully uploading and installing the SOFORT module, it can be configured.
5.1. Payment method configuration
1. Go to "Configuration > Basic settings" in your admin area.
2. Click the plus sign in the left column in the menu item "Payment methods" and then "Sofort AG Shopware Module". If the module has been integrated correctly, the available payment methods for this module will appear there.
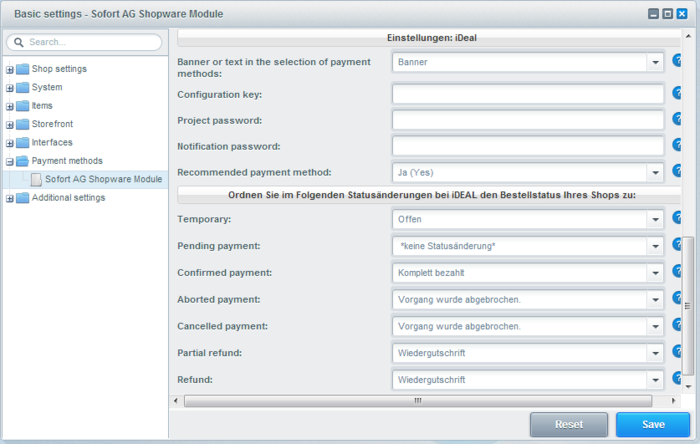
3. Insert the configuration key, the project password, and the notification password from the SOFORT merchant area in the respective field "Configuration key", "Project password", and "Notification password".
4. The following expert settings are already set with default values so that no configuration is required.
- Plugin Grundeinstellungen
- Reason 1/Reason 2: You may enter the standard reason here used for Shopware transactions. Therefore, you can use the following replacement parameters:
- {{order_id}} - Order number
- {{order_date}} -Order date
- {{customer_id}} - End customer number
- {{customer_name}} - End customer name
- {{customer_company}} - Company name of end customer
- {{customer_email}} - Email address of end customer
- {{transaction_id}} - Shopware transaction-ID
- Activate logging: If activated calls of the SOFORT interface will be logged ("Configuration > Logfile > Sofort AG Log"). For reasons of privacy activate this feature only for debugging purposes.
- Discard aborted payments: If activated orders will not be stored in Shopware it the payment is aborted.
- Reason 1/Reason 2: You may enter the standard reason here used for Shopware transactions. Therefore, you can use the following replacement parameters:
- Einstellungen iDEAL
- Banner or text in the selection of payment methods: Choose here how the payment method Shopware will be presented at the checkout.
- Recommended payment method: If activated the payment method Shopware will be presented as "(recommended payment method)".
- Status settings: With the following settings you can determine the order status that is set according to the payment status at SOFORT.
- Temporary: Define the status for orders which have not been paid yet.
- Pending payment: Define the status for orders which have been paid completely, with iDEAL not yet having confirmed the payment as guaranteed.
- Confirmed payment: Define the status for orders which have been paid completely, with iDEAL having confirmed the payment as guaranteed.
- Aborted payment: Define the status for orders which have been aborted.
- Canceled payment: Define the status for orders which have been aborted by iDEAL.
- Partial refund: Define the status for orders which will be partially refunded.
- Refund: Define the status for orders which will be completely refunded.
After installing and configuring the module, the respective payment method must finally be activated to be displayed to your customer when selecting a payment method (see next chapter).
5.2. Individual payment method activation
1. Go to "Configuration > Payment methods" in the admin area of your shop. All available payment methods are displayed.
2. Click the desired payment method (e.g. Shopware ). You may now adjust specific shop settings as regards this payment method, e.g. availability for certain countries, surcharges, etc.
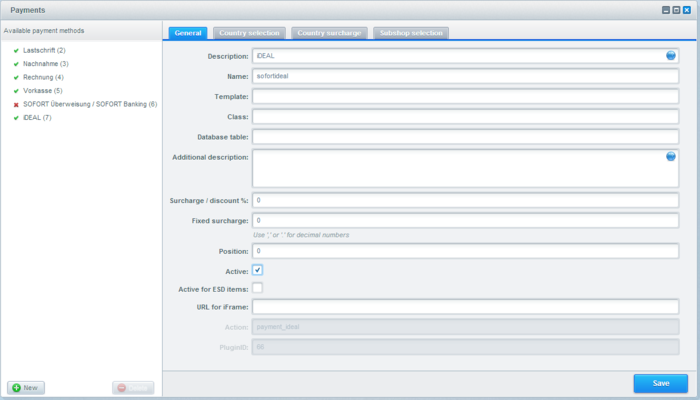
3. Enable the checkbox "Active" to activate the module.
4. In the field "Position" you may determine the placement of the payment method in the payment selection list (the lower the number, the higher up the payment method will be placed).
5.3. Mapping the payment method with the shipping costs
- Navigate to "Configuration > Shipping costs"
- Do the following steps for each shipping cost entry that should be used together with Shopware :
- Click on the pencil symbol to edit the shipping cost entry
- Choose the payment method Shopware on the tab "Payments", click on the right arrow and choose "Save".
5.4. Finalization of the configuration
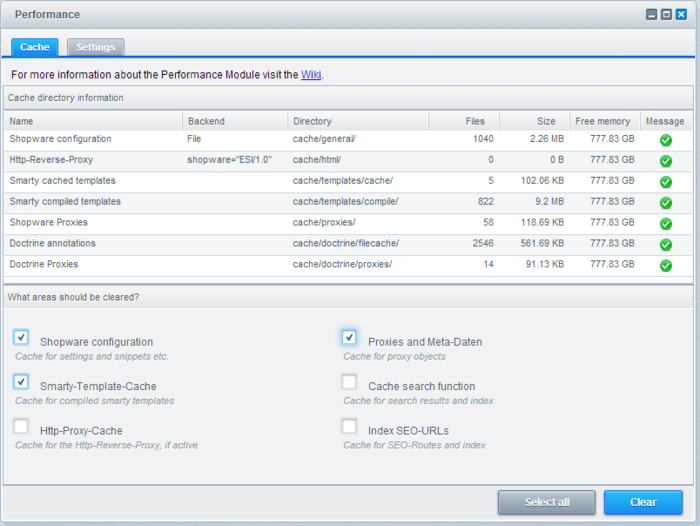
To apply the chosen settings, the shop cache needs to be cleared. Click on "Configuration > Caches / Performance", choose the following settings in the performance tab and click finally on "Clear":
Information on orders paid by Shopware can be found in "Customer > Orders".
If you have selected Place order before redirection: No in the settings of our module you can quickly delete all (or single) orders for which the payment was not completed. You can find the overview over these orders under "Customer > Payments > Sofort AG Orders"
Please note: Beginning with version 2.2.0 of the module there is the possibility to change the order creation process of an order paid with SOFORT. Following the steps below the order process will be
adapted to the process known from other payment modules and therefore increasing compatibility with other modules (like for example "Bonus-System":
1) Edit the file "OrderProcessHelper.php" which you can find in the folder "/engine/Shopware/Plugins/Community/Frontend/SofortPayment/Components/Helpers/" on your server. Change the line "private $createOrder = true;" to
"private $createOrder = false;"
2) In the settings of the SOFORT module in the Shopware-Backend set the option "Place order before redirection:" to "No"
Notice: If this change is made the order number cannot be used in the reason fields of the transaction.
6. Testing
You can activate the test mode for your project in the merchant area (under "My projects > Select project > Base settings> Test mode") to test the correct integration and the functionality of the HTPP(S) notification.
As soon as the test mode has been activated, the following iDEAL status messages can be activated by the following amounts:
- 1 EUR => Successful payment
- 2 EUR => Payment aborted
- 3 EUR => Expired payment (errorCode 6001)
- 4 EUR => Pending payment
- 5 EUR => Payment error (errorCode 6000)
The amounts with the corresponding status messages are also listed in a drop down list which is displayed in the SOFORT merchant area with activated test mode.
NOTE!
Real transactions cannot be carried out if test mode is active.
6.1. Functional test
In order to fully test the functionality of the iDEAL integration, please carry out a test transfer directly in your system. Please follow these steps:
- Activate test mode (see above)
- Place an order in your system and select iDEAL as payment method
- Transfer test data for the individual cases
- Check correct redirection
- Is the customer redirected to the confirmation page after the transaction?
- Are all notifications received correctly?
- Is the order status set correctly and is the order created correctly?
6.2. System test (payment wizard)
In the merchant area, the tab "Test project" provides a test opportunity in your iDEAL project with SOFORT. You can specify different parameters to issue the HTML code for calling the interface and the string for hash generation. Additionally, you can call the payment wizard and go through all steps of the transfer.
This way of testing is not appropriate to simulate the entire process.
7. Support & Contact
The ''Direct Bank Transfer'' team will be available if you need help.
You may send us an email at service@sofort.com.
We are also glad to assist you in case of technical issues:
Technical support:
Phone: +49 (0)89 24 88 37 691
Email: integration@sofort.com
Business hours:
Monday to Thursday: 8:30 a.m. to 6:00 p.m.
Friday: 8:30 a.m. to 5:00 p.m.
8. Legal Notice
SOFORT GmbH
Theresienhöhe 12
80339 Munich
Germany
Support for customers
Phone: +49 (0)89 24 88 37 690
Support for merchants
Phone: +49 (0)89 24 88 37 692
info@sofort.com
www.sofort.com
Directors
Felix Würtenberger
Wilhelmus Geerling Klaassen
External Data Protection Officer
Mr. Michael Schramm, LL.M.
For privacy questions please contact us at: datenschutz@sofort.com
Registered at the District Court Munich
HRB 218675
VAT-ID: DE248376956
© SOFORT GmbH. All rights reserved, including the translation.
The documentation including all published content is protected by copyright. Reprints or reproduction of any kind and processing, duplication, and distribution using electronic systems of any kind shall only be permitted with prior written consent of SOFORT GmbH.
The contents of this documentation and the implementation of the information contained therein may only be used at your own risk. SOFORT GmbH assumes no responsibility for the function of individual programmes or of parts of them. In particular, SOFORT GmbH assumes no responsibility for possible damages resulting from the use.